Linking Alpine.js to a Database REST API: An Easy Tutorial
In this guide, we'll explore creating a dynamic web application with Alpine.js. We'll set up a frontend using Alpine.js, a minimalistic JavaScript/HTML framework, and integrate it with a comprehensive REST API database backend. For rapid design, we'll use DaisyUI and Tailwind CSS. This project offers a hands-on way to see these technologies in action.

Project setup
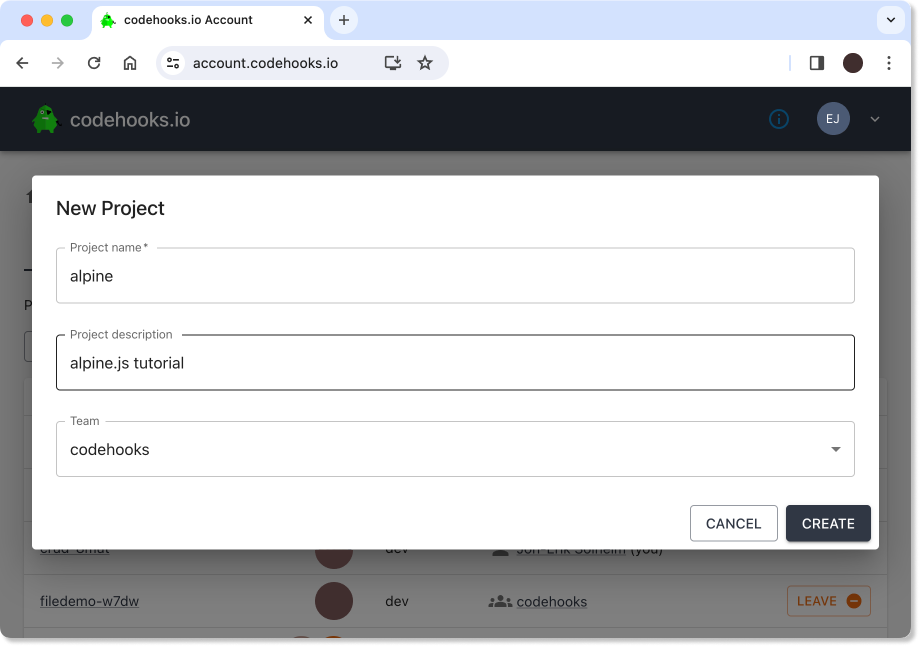
After creating a new account (if you don't have one already), you should create a new project using the the Codehooks account web app (click the [NEW PROJECT +] button). Give your project any name you like, in this example we'll use the projectname alpine.

Log in to your account with the CLI
Make sure to install the latest version of the Codehooks CLI.
npm i -g codehooks
Then, log in to your account.
coho login
Create the Codehooks source files
Next, create a new directory to hold the source code, e.g. myalpine.
mkdir myalpine
cd myalpine
The CLI command coho init will attach the local project directory to a Codehooks project (the CLI will present a list), this creates a default Codehooks app file index.js and a project specific config.js file.
coho init
This command creates a default backend app index.js, change this code to the following:
/*
  Alpine.js REST API data example
*/
import { app } from 'codehooks-js';

app.static({ route: '/static', directory: '/app' });

// Use Crudlify to create a REST API for any collection
app.crudlify();

// bind to serverless runtime
export default app.init();
In same the project directory, install the codehooks-js NPM package.
npm i codehooks-js
Deploy the default CRUD backend server.
coho deploy
We'll repeat the deploy command after adding the client side Alpine.js html files (see next sections).
Create the database and deploy the backend server
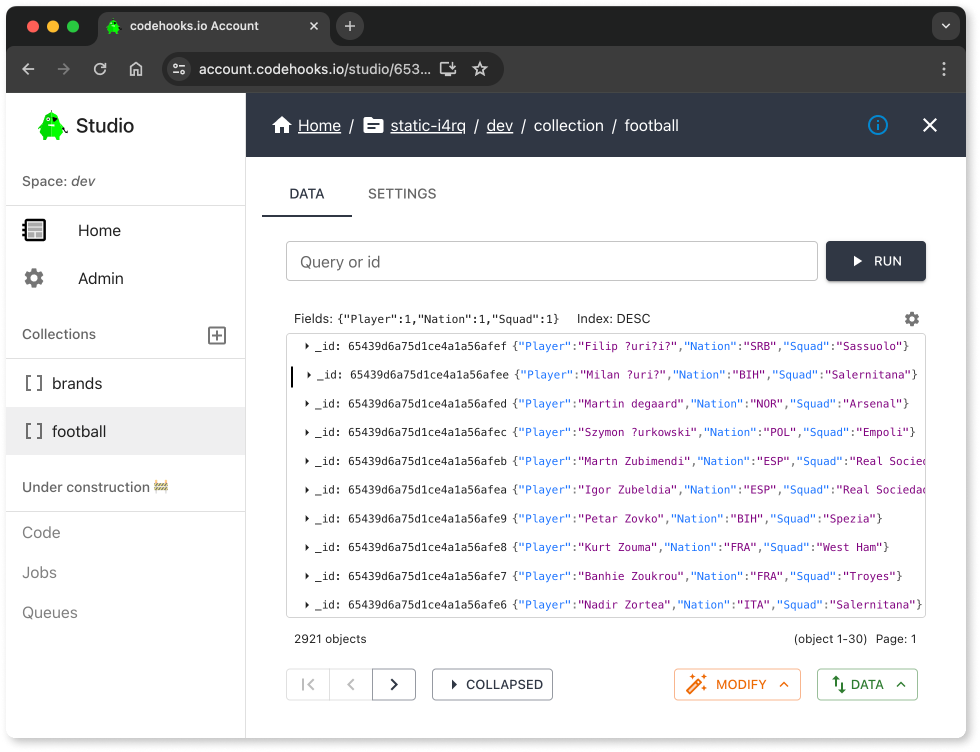
To create a database of football players we use this Kaggle dataset. The dataset is a CSV file 2021-2022-Football-Player-Stats.csv with 2921 players.
We can import the full dataset with the CLI command coho import, note that this file has a different separator (semicolon) and encoding (latin1).
coho import -f ~/Downloads/2021-2022-Football-Player-Stats.csv -c football --separator ';' --encoding 'latin1'
You can also import data in the Studio app, either way you should see a football collection like the one shown in the screen shot below.

The database backend is now ready to serve REST API calls from web client applications. Keep reading to learn how to create the Alpine.js web app.
Create the Alpine.js source files
In the project directory, create a new a sub directory (e.g. app) to hold the Alpine.js files.
mkdir app
In the subdirectory app, create two new files for the alpine-js source code.
cd app
touch index.js script.js
The project setup is now ready, and your project directory should have the following structure:
.
├── app
│   ├── index.html
│   └── script.js
├── config.json
├── index.js
└── node_modules
The Alpine.js frontend application
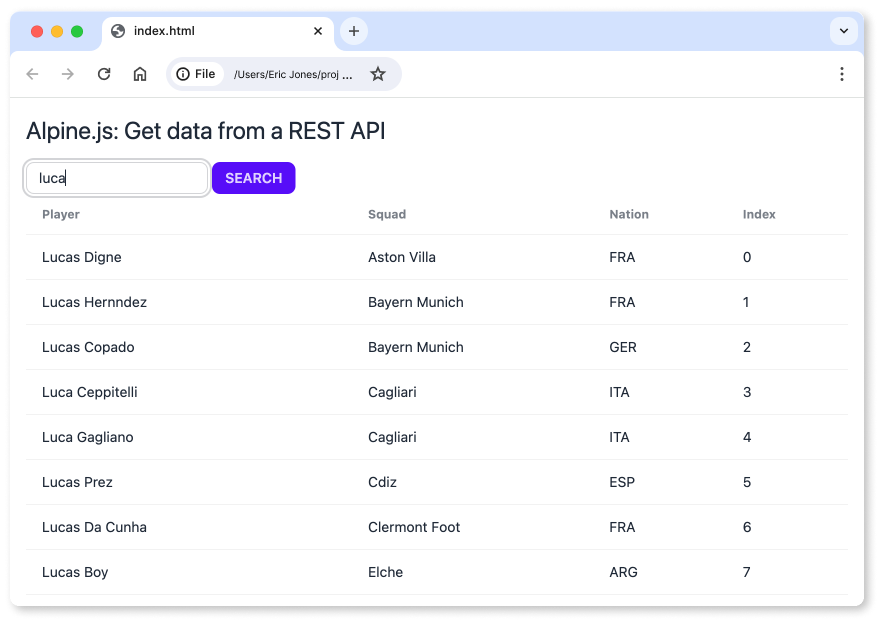
The Alpine.js app (located in the app/index.html file) demonstrates the interactive search page for football players.
The working application is shown in the screen shot below (running locally from the file system).

You can test a live version of the Alpine.js app here.
This example app demonstrates two important features in Alpine.js:
- Loading external data into a global datamodel using Alpine store
- Changing the application state by calling a method on the global datamodel when an input area changes using Alpine events
The app/index.html code is shown below, notice line 14,16 with the event listener calling a method on the global datamodel, and line 27-34 iterating on the rows in the global datamodel. Make sure to copy the source code below info your local files to test.
This example also uses DaisyUI and Tailwind CSS.
<html>
  <head>
    <meta charset="UTF-8" />
    <meta name="viewport" content="width=device-width, initial-scale=1.0" />
    <link
      href="https://cdn.jsdelivr.net/npm/[email protected]/dist/full.css"
      rel="stylesheet"
      type="text/css"
    />
    <script src="https://cdn.tailwindcss.com"></script>
    <script
      defer
      src="https://cdn.jsdelivr.net/npm/[email protected]/dist/cdn.min.js"
    ></script>
    <script src="script.js"></script>
  </head>

  <body class="p-4">
    <h1
      class="text-2xl pb-4"
      x-data="{ message: 'Alpine.js: Get data from a REST API' }"
      x-text="message"
    ></h1>
    <div x-data>
      <input
        @keyup.enter="$store.coho.getData()"
        x-model="$store.coho.search"
        placeholder="Search for player ..."
        class="input input-bordered input-sm"
      />
      <button @click="$store.coho.getData()" class="btn btn-primary btn-sm">
        Search
      </button>
    </div>
    <div class="overflow-x-auto">
      <table class="table">
        <thead>
          <th>Player</th>
          <th>Squad</th>
          <th>Nation</th>
          <th>Index</th>
        </thead>
        <tbody x-data>
          <template x-for="(player, index) in $store.coho.players">
            <tr>
              <td x-text="player.Player"></td>
              <td x-text="player.Squad"></td>
              <td x-text="player.Nation"></td>
              <td x-text="index"></td>
            </tr>
          </template>
        </tbody>
      </table>
      <div x-data>
        <span
          x-show="$store.coho.loading"
          class="loading loading-dots loading-sm"
        ></span>
      </div>
    </div>
  </body>
</html>
The application global state (let's call it coho) is an Alpine store and it's implemented in the app/script.js file shown below.
// replace this with your project url, use CLI command 'coho info' to find yours
const MY_CODEHOOKS_URL = '/football';
// replace this with your own read-only key, use CLI command 'coho add-token' to create a new one
const MY_API_KEY = '0b49638f-56c3-48e9-8725-7f3c20f25316';

document.addEventListener('alpine:init', () => {
  Alpine.store('coho', {
    loading: false,
    search: '',
    players: [],
    async getData() {
      this.loading = true;
      this.players = await getDataFromAPI(this.search);
      this.loading = false;
    },
  });
});
// Fetch data from Codehooks REST API
async function getDataFromAPI(search) {
  var myHeaders = new Headers();
  myHeaders.append('x-apikey', MY_API_KEY); // read-only token
  myHeaders.append('Content-Type', 'application/json');

  var requestOptions = {
    method: 'GET',
    headers: myHeaders,
    redirect: 'follow',
  };
  var query = '{}';
  console.log('getData', search);
  if (search.length > 0) {
    query = JSON.stringify({ Player: { $regex: search, $options: 'gi' } });
  }
  var hints = JSON.stringify({
    sort: { Squad: 1, Nation: 1 },
    $fields: { Player: 1, Nation: 1, Squad: 1 },
  });
  var URL = `${MY_CODEHOOKS_URL}?q=${query}&h=${hints}`;
  console.log(URL);
  const response = await fetch(URL, requestOptions);
  return response.json();
}
Deploy the complete Alpine.js front-end and backend application
After adding the client side files as described above, you can run the CLI command deploy again.
This will upload the static assets so it can be served under your domain.
coho deploy
Open the app/index.html file in your web browser to test the Alpine.js web app locally, or open the auto generated domain, e.g. https://amiable-zephyr-e964.codehooks.io/static/index.html.
Conclusion
This tutorial provided you with a hands-on example which combined Alpine.js with a REST API backend using Codehooks.io. By following the steps outlined, you'll gain a deeper understanding of how you can apply these technologies in your own projects.
Source code at Github here.
